
One of the things you will quickly discover as you explore with your microscope is that things don't just look bigger. They also get darker and harder to bring into focus. Why?
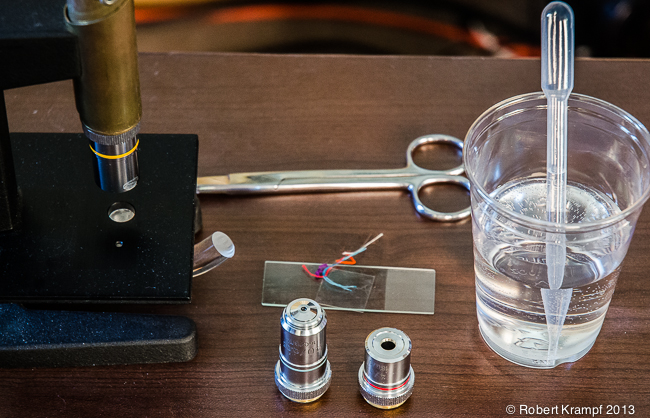
To explore that, you will need:
- a microscope
- pieces of colored thread
- water
- dropper
- scissors
- slide and coverslip, or plastic specimen holder
Start by cutting 1/2 inch pieces of three different colors of thread. Place a drop of water on a clean slide, and place the threads in the drop, arranging them so that they all cross at about the same spot. Carefully place a clean coverslip on top. If the water does not cover the area under the coverslip, place a drop of water just at the edge. The water will flow under the coverslip. Carefully blot away any extra.
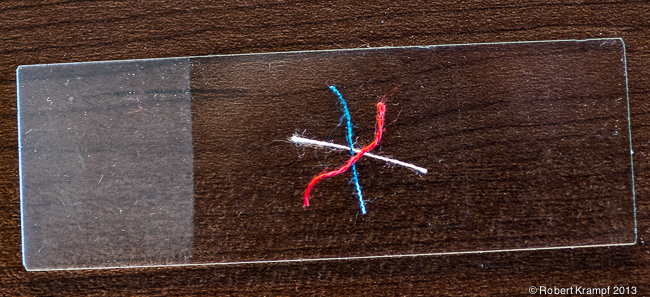
Hold the slide in your hand and look carefully at the threads. Many kinds of thread become translucent when wet, so it may be difficult to tell which thread is on top, which is in the middle, and which is on the bottom.
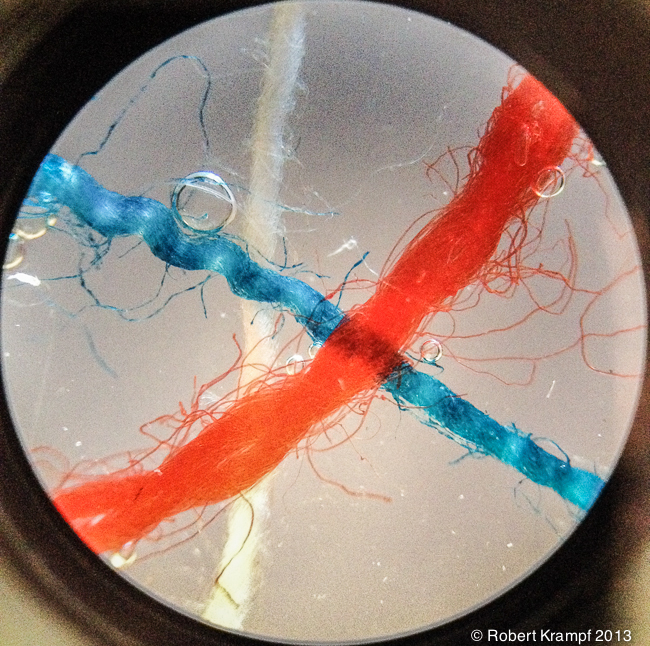
Threads at 40X
Set your microscope with the lowest power objective. Place the slide on the stage, and looking from the side, bring the objective as close to the slide as possible. Looking through the microscope, focus away from the specimen until the image comes into focus.
The photo on the right was taken at 40X (10X eyepiece and 4X objective) through my Brock Magiscope. I took the photo by placing the camera of my IPhone above the eyepiece.. Notice that all three threads are fairly well in focus, although the white thread on the bottom is a bit blurry. At low magnification, things appear bright, and it is easy to bring them into focus.
Threads at 100X
Once you have explored the threads at 40X, switch to a higher powered objective.
This is the same slide at 100X (10X eyepiece and 10X objective). You probably notice three changes from the previous photo. First, the threads look larger, which is what we expect. You will also notice that the photo is a bit darker than it was at 40X. Also, only a small part of the image is clearly in focus.
Once you have explored the threads at 100X, it is time for even more magnification.
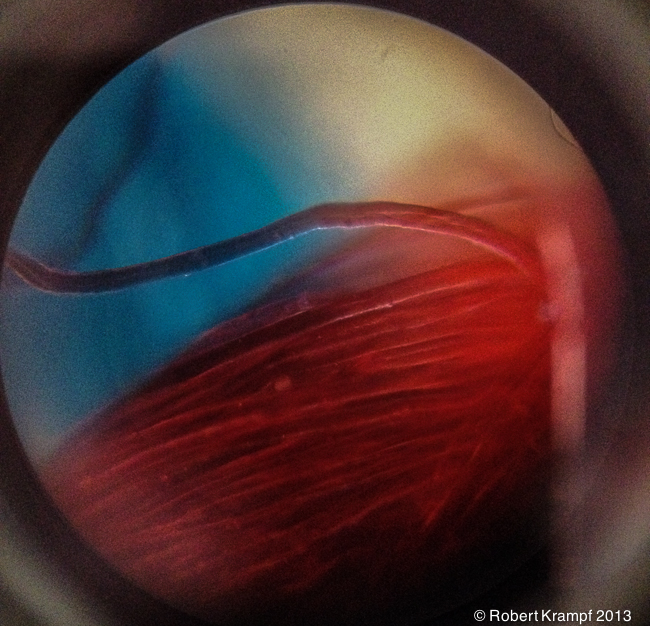
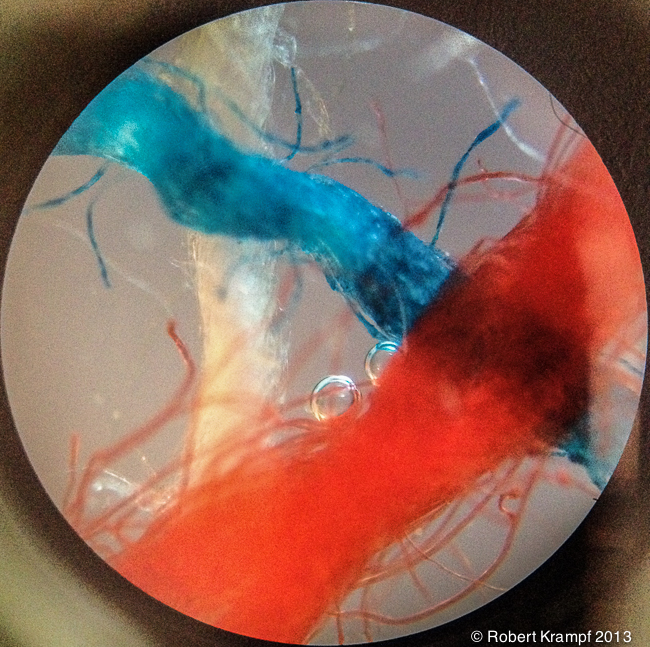
Threads at 400X
This time, I used the 40X objective with my 10X eyepiece to magnify the image 400X. At this magnification, the image is much darker and we can't even get an entire thread in focus. Instead we have to decide to focus on the top, middle, or bottom of the thread. Why?
Depth of Field in photography
Lets start with the focus. Every arrangement of lenses has a range of things that are clearly in focus. That is called the depth of field. Things that are outside the depth of field are blurry.
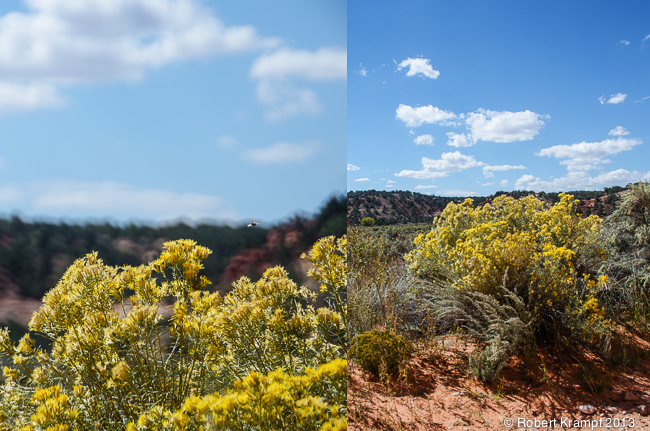
You can see the same thing when you take photos with your camera. In a wide angle photo, you have a very deep depth of field, and pretty much everything looks in focus. If you magnify things with a telephoto lens, your depth of field narrows, and you have to choose what will be in focus and what will be blurry.
The same is true when you use a microscope. The higher the magnification, the narrower the depth of field. At even higher magnification, you can't even get a single fiber from the thread in focus. This greatly limits what you can see at higher magnifications.
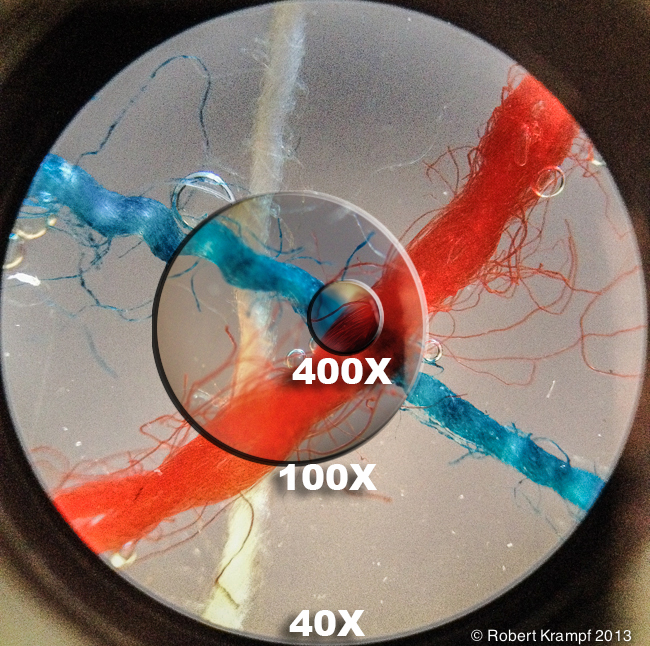
Compare the brightness of the three areas.
The other thing that changes as you increase magnification is the amount of light. Why does magnifying something make it darker? To help answer that, take a look at the photo on the right.
The large circle is the image at 40X. When you magnify the image by 100X, you are taking the light from the 100X circle, and spreading it out to cover the same area as the 40X circle.
That is like taking the icing from a cupcake and spreading it over a full sized cake. The sweet icing gets spread a lot thinner, and the cake would not be as sweet.
Now apply that model to the images from the microscope. The more you magnify an image, the thinner the light gets spread, and you reach the point where even with a very bright light, the image is too dark to see anything.
We get around the problems of brightness and depth of field by using something besides light for the microscope. Images like the one below are taken with a scanning electron microscope, using a beam of electrons instead of light. One drawback is that since there is no light, there is no color. These images are always black and white, unless they have been artificially colored.
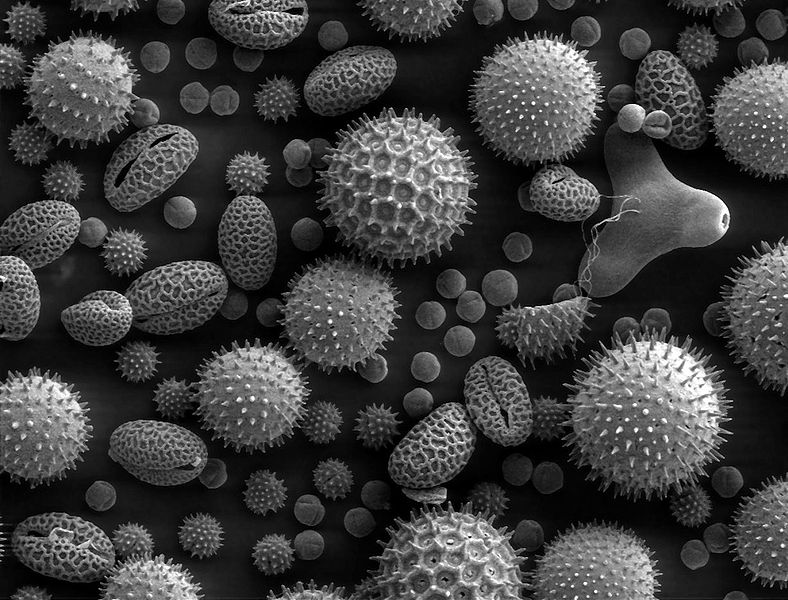
By OncheOncheOndulay (Own work) [CC-BY-SA-3.0 (http://creativecommons.org/licenses/by-sa/3.0)], via Wikimedia Commons